
attic, part 5: texturing
02.05 unlike makeup, thick is good
 click to see the full photo galleryYou'd think by now we'd have learned to just do what all the how-to manuals and helpful friends tell us to do when it comes to home improvement. You'd think that, wouldn't you?
When last you heard from us, we'd finally wrapped up all that taping and mudding, which we'd started off and on July through September, but didn't really get going on until December and finally finished in January. And then came the sanding, which, ugh, and then the blessed end of that nightmare.
So when it was time to start texturing, we were more than ready to get started. We'd done a lot of reading online and in all our books, as well as talking to everyone we know about their recommendations for what to do and how to do it. Nearly everyone/thing talked about using a sprayer to apply the texture and from there, one of two basic options: orange peel or knockdown. We did find a site that had lots of other variations that were mostly based on one of these two, but that's what it came down to.
Now, we'd planned all along to do something like a knockdown, knowing that there are all manner of imperfections and whatnot that need some good camouflaging. But that was before we surprised ourselves with how good a job we actually did on the taping/mudding -- not that we'll be winning the Bob Vila Home Improvement Seal of Approval, mind, but we sling a mean drywall trowel. And with the attic's dimensions being what they are -- which is to say slanted ceilings and low walls, I was concerned that we'll be likely to brush against the walls more often than in a regular room and that having a rougher texture would probably mean Wall - 1, Homeowner - 0.
Orange peel seemed the way to go -- it's a thinner application and not likely to shave off layers of flesh during inadvertent contact -- but all I could think was apartment, apartment, apartment. Seriously. Every apartment we've ever lived in had an orange peel texture on the walls. Which doesn't make it a bad texture, but as I said, apartment, and therefore, no. Which left us to come up with something of our own. And if you're a regular reader of the site/newsletter, you should recognize that this is never a Good Thing.
While mulling the problem over, which I'm wont to do pretty much any time my mind is otherwise unoccupied, I had a brainstorm: paint rollers! If a texture can be applied with a spray gun, surely it would work with paint roller, right? Well...yes. Technically.
Our very dear friend (also my lovely photoblog partner) had been helping us during the dreaded taping/mudding/sanding phase, and graciously offered to continue helping us during the texturing phase, too. This was instrumental, as we never would've gotten it finished without her, so mad props to the woman for saving us from ourselves.
The texture wasn't hard, really. It took some trial and error getting the right consistency (not too thick, not too thin) and the right roller nap (1½" worked best). Technique is just however you can get it up on the wall because you can't see any pattern anyway and after about an hour or so, that roller's so loaded up with drywall mud that it weighs as much as a certain wet cat on a stick and is about as easy to control. Aside from the fact that we were applying it with rollers instead of a sprayer and therefore that it took a lot longer, the main thing was simply how incredibly heavy the rollers were. I'm not so sure we shouldn't have used some kind of arm and back braces because seriously.
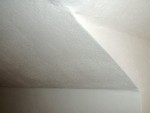
Once it was all applied, though, it looked good. A little thin, but we thought eh, let it dry, see what it looks like then. Well, not much better. Oh, the texture was fine and in most places, didn't need anything. But others were so thin you couldn't tell that we'd done anything. So we did have to go back over several places and apply a second coat, which sucked obviously, but overall, not bad.
We're fairly pleased with the results. There's not as much disguise as we would've gotten with the knockdown so there are spots where you can see indents where there's a drywall screw or seam that didn't get mudded as thoroughly as we originally thought. And by the way, what's the deal with seams and dimples that seem camoflaged before you start texturing but then magically come screaming out of the drywall as if you'd highlighted them with magic marker once the texturing's done? There's got to be someone we could hold responsible for violating truth in advertising laws.