
attic, part 3: eave closets
05.04 - 11.04 "a yard sale would've been so much easier"
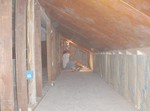 click to see the full photo galleryOur attic is a big wide open space that runs the full length and almost the full width of the house. It's gonna make a freakin' awesome master suite when it's done, which may or may not be before we retire, but eh, we're optimists. Unfortunately, wide open space does not equal storage. Would you believe there's only one closet in the entire house? (It's a small little sort of walk-in affair in one of the downstairs bedrooms - although it does have a nice large window in it. Which, heh.) Built-in storage all over the place, yes, but only one closet. Closets came in the form of armoires and the like back in the day, so there wouldn't have been as much reason to use precious space for closets.
But times have changed, obviously, and we need some closet space. Not just for clothes -- the one lone closet has been serving us both and it's been fine, if a little cramped -- but we do have a lot of stuff (yes, we heard that concerted "no shit" from everyone who's ever helped us move, to which we say, "pffft"). And stuff requires storage. Which brings us back to the attic.
The previous owners were making use of storage space under the eaves, which is to say that they cut some access holes in the knee wall, slapped a bunch of loose pieces of plywood across the rafters, and stacked a bunch of mostly worthless crap under the eaves that we then had to haul out when our work began. We then proceeded to make them into proper storage spaces and when last you saw us there, we had put down the subfloors and framed out all the outer knee walls that will enclose them. And then the whole drywallling extravaganza began and the closets stayed that way for awhile.
Once most of the drywall pieces were finally up, it was time to put the paneling up in the closets so they'd be completely enclosed. Remember that the paneling was actually the stuff that'd been used for the attic walls originally and though the stuff wasn't what we wanted for the main room, it's actually really nice stuff -- the same thin fir panels that are in the dining room downstairs. It seemed a shame to just throw it out since it's in good shape and as old as the rest of house, so we decided to panel the closets with it to save money.
I never really thought about it until we started, but paneling a space isn't anything like drywalling it. There're the obvious material differences, of course, but drywalling is a lot more forgiving. When you have larger gaps than you might like or don't cut a piece just right, there's always drywall compound to the rescue and jeebus knows we took full advantage of this when we were working on the main room. When it comes to paneling, however, every piece pretty much has to fit exactly right. There's wood putty and painter's caulk for the joints, of course, but they don't fill in half-inch gaps very well. No, trust us -- they don't...we tried.
Anyway, every piece had to be custom measured, cut, fitted, and nailed into place before we could move on to the next one. And of course, due to the vagaries of an old house -- what's known in the charming parlance of real-estate agents and other big fat liars as "character" -- means there are no square corners or plumb walls. And just because we're never satisfied unless we've made a job as absolutely difficult as possible, the backside of every main room knee wall has at least one outlet to be cut into the panel. Good times, my friend, good times.
The most logical place to start seemed like the ceiling, and it was. It was also the hardest part and about the only good thing to say about it was that at least we got the worst part out of the way first. Not much consolation, we're here to tell you. It wasn't just the working over your head part that sucked, either. We had a similar problem with the panels that we did with the drywall, i.e., the insulation bulging out so that it made it extremely difficult to hold the panels in place long enough to affix them. Plus, the closets are less than five feet high at their peak, which meant cramped quarters. We finally figured out a method that involved a wooden school chair that the description just won't do justice to, but I'll give it a shot anyway.
We'd spent the better part an hour trying to get our first paneling piece up on the first day and about the only way to do it with the two of us was for both of us to get the panel in place, then I'd crawl into the center, settle on my knees, and lean up against it with my back -- not holding it up but pressing it hard against the rafters -- and using my arms for balance, and then Sal would crawl around me and get it nailed into place. It had to be nailed in several places before I could safely release pressure on the panel and be sure it wasn't going to pop off. But I'm not tall enough on my knees to hit it just right in the center to hold enough pressure against it, so I couldn't hold it as tightly as I could if I were able to get closer. Which is where the chair came in.
See, there's this old wooden school chair with metal legs we've had for ages. It's charming and sturdy and makes the perfect stepstool. After getting the first panel up, we both realized there was no way we'd be able to keep that up for long. There were 15 more four foot panels to put up and at the rate we were going, it'd be Thanksgiving before the stupid things were up. We decided to take a break for lunch and figure out a better way to do it.
I had the brilliant brainstorm -- and it was brilliant, as you'll see later -- of trying out that little wooden chair to see if it would help. The way it worked was we'd both get the panel situated, with the chair sitting in the middle, then I would scoot around and sit down in it, which forced me to bend forward and I could easily press my back against it. To put good pressure on it, I'd then rock the chair slightly so it was balanced on the back two legs, wedging myself tighter against the panel, and put my feet up on the wall opposite to keep myself from rocking forward on all four legs until Sal was done nailing it in place. It sounds horribly uncomfortable and maybe even painful, but it actually worked quite well and since I wasn't kneeling anymore, saved me a lot of aches and pains. The rest of the panels went up relatively quickly after that.
We of course don't have pictures of our little maneuver because hello, hands full. Oh, Sal may have said something about running downstairs to get the camera while I was wedged in there tight, but one look at my face and he muttered a hurried "just kidding" and went back to hammering. Smart man.
Then it was time to cut all the wall pieces. They were a little easier in that we didn't have the insulation problem we had with the ceiling but, as I said, all those outlet holes had to be cut out, not to mention contending with out-of-plumb door openings and what not. Despite all of that, though, the closets turned out remarkably well.
Look at those nice, tight seams every which way, and the way the outlets fit perfectly. Behold our incredible photo-touching carpentry skills! Yeah, we rock.